Wanted to share something I’ve been working on that some of you might find useful.
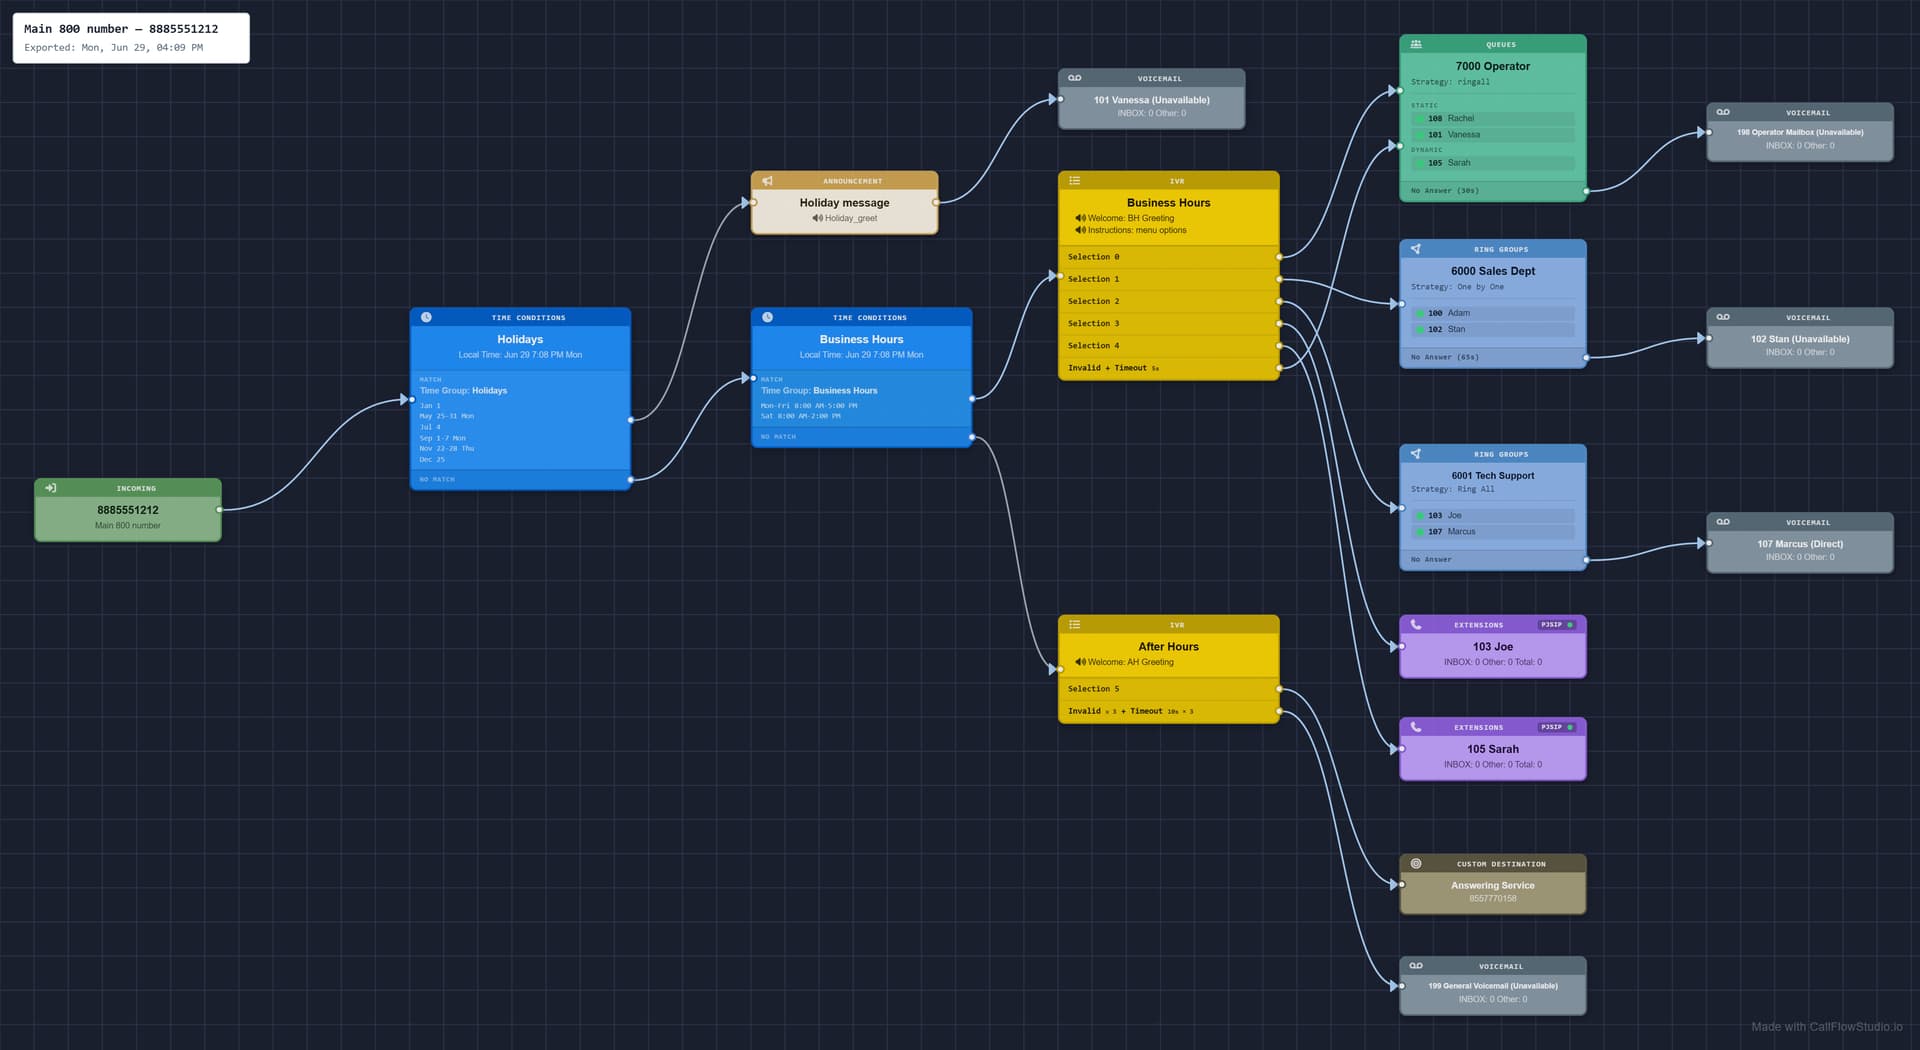
Call Flow Studio draws your whole VitalPBX dial plan as one diagram, from the inbound route down to voicemail. Working out where a call actually ends up usually means clicking through inbound routes, time conditions, IVRs, queues and ring groups and holding the whole chain in your head. This just shows you the full flow for any number on one screen.
On VitalPBX it’s read-only. It pulls from the same data VitalPBX uses to route calls and never writes anything back, so there’s nothing to set up and no way for it to touch your config. You install it and it draws what’s already there.
What it does:
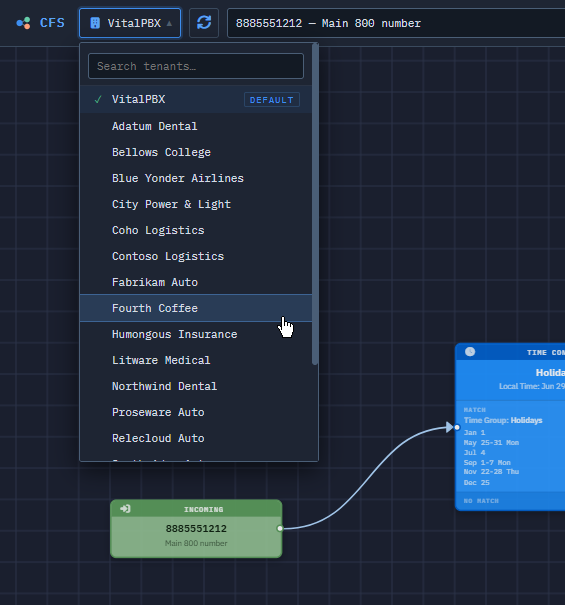
Multi-tenant aware. Each tenant gets its own canvas and you switch between them in a click.
Shows live state on the diagram: extension registration, queue agents, night mode, call forwarding. You can also simulate a date and time and see which path a call would take then.
Exports clean PNG or vector SVG, which is handy for documentation or handing a setup off to a client.
I built it, and it’s a paid product. It installs free, and the first 30 days are a full trial with every tenant unlocked. After that it settles to a free version that keeps visualizing your first couple of tenants for good, and a one-time per-PBX license reopens all of them whenever you want. Runs on both VitalPBX 3 and 4.
A few weeks on, a quick update on what’s changed. Most of it came out of VitalPBX boxes in the field rather than my own list.
Search now spans every tenant at once. When you know a call flow is on the box but can’t remember which tenant it lives in, the search looks across all the tenants you have access to and takes you straight to it, instead of opening them one at a time.
Flip to “All tenants” and you’ll see those results as well.
Custom contexts now draw as real destinations instead of an “unsupported module” placeholder, so a flow that routes into one keeps going instead of stopping dead.
Selecting a node shows that module’s configuration in the side panel, using the same field names and grouping VitalPBX uses.
There’s also hide-a-branch, which collapses everything downstream of a node and remembers it per tenant.
That’s all in 1.0.13. Let me know if you run into anything or have suggestions.
@mbeauverd, good to hear it’s running well on your multitenant server, and thanks for reporting back.
It’s been a while since my last update, so here’s what’s new on the VitalPBX side. The first one came from a customer request.
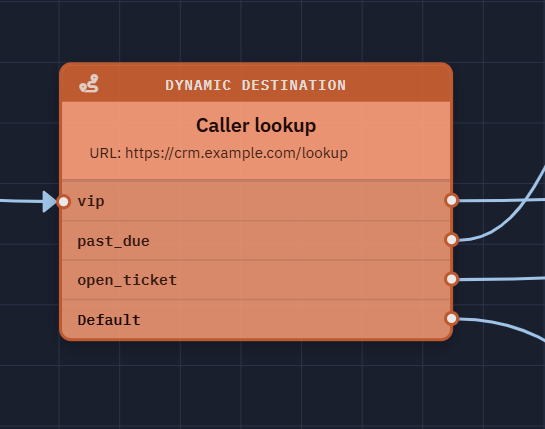
Dynamic Destinations are drawn now, with each response as its own branch. The card shows where the lookup goes (the URL or the MySQL database), disabled responses are dimmed, and the full settings are in the side panel with passwords hidden.
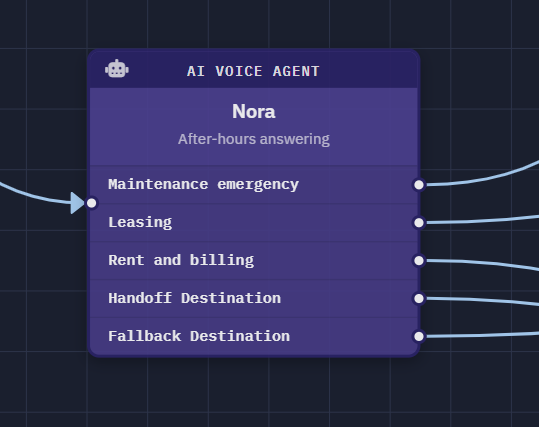
AI Voice Agents from VitalPBX’s add-on get their own card. Each transfer destination is its own branch, along with the handoff and the fallback, and the agent’s settings show in the side panel. Before this the flow stopped at an “unsupported” placeholder.
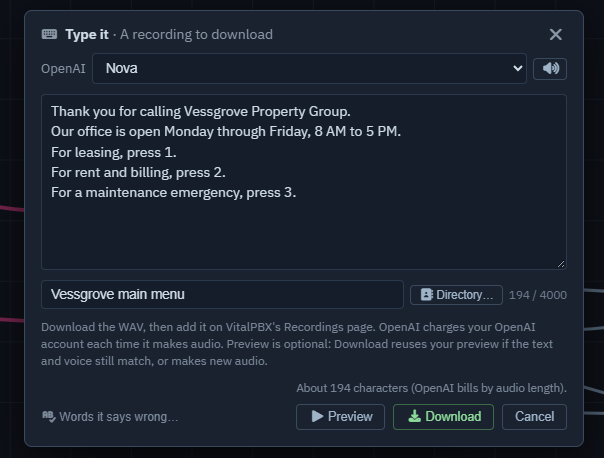
Type it makes greetings from text. Type the words, pick an ElevenLabs or OpenAI voice, preview it, and download the WAV to add on the Recordings page. It uses your own API key, saved encrypted in Settings. Nothing goes through our servers, and it keeps working after the trial ends.
Favorites stay at the top of the destination list, and admins can star destinations for a whole tenant.
Ctrl+F searches the call flow you’re looking at, down to who’s in each queue and ring group, renamed IVR options and sticky notes. Enter jumps from match to match.
IVR greetings, announcements and other recordings play right on the card.
All of this is in 1.0.21. Let me know if you run into anything or have suggestions.
Right now it installs on the PBX itself. I’ve been trying it the other way, on a separate server next to the PBX, and it works: nothing gets installed on the PBX, it only needs a few logins created there.
Before I take that further, a question for you and anyone else reading:
Would you rather run it that way?
If so, what’s the main reason? Keeping third-party software off the PBX, or something else?
Would you want it as a Docker container, or installed on a plain Linux server or VM?
Nice stuff and apologies for the silence on the “other” channel. I personally would prefer it running on a server next to VitalPBX. Purely to keep Vital clean. Selfish me would prefer a native Linux install but I understand many people like Docker for ease of deploy.
Thanks for answering, and no worries about the other channel.
A separate-server version isn’t off the table. It works in my testing, but it isn’t something I can offer right now. The PBX still needs a few logins and shared folders set up for it, and I’d want more people asking before I take on supporting that. So for now it installs on the PBX.
On keeping VitalPBX clean: Call Flow Studio only reads from VitalPBX. It never changes your configuration, it keeps its own settings in its own database, and uninstalling it removes what it added apart from its log folder.
If you’d use a separate-server version, give this post a like or add a reply, even if installing on the PBX is fine for you today. That’s how I’ll know when to come back to it.
I agree it would need to be next to VitalPBX and not on it. But I think giving the option to who wants to run what would be great. It’s not difficult to create a Linux script that would automatically run from your Github depending on which direction someone would want to go…either Docker or Linux. Even if its a VM, we can install Debian or Ubuntu and just copy and paste the script into a terminal on the shell and let it install.