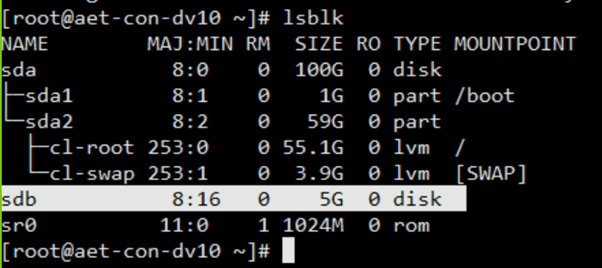
The first step is to format our new disk with the Linux LVM format. After connecting or installing the HD, we will use the command “lsblk” to see the name assigned to our new drive.
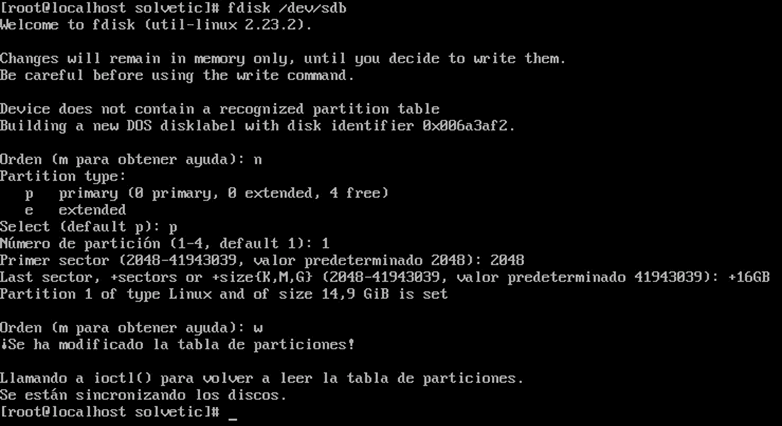
Now that we have the name, we will use the command “fdisk” to format the disk.
- fdisk /dev/sdb
- n (new partition)
- p (primary)
- (Press ENTER) (Use default partition number)
- (Press ENTER) (Use default first sector)
- (Press ENTER) (Use default last sector)
- t (change the partition type)
See the screenshot for the options you should pick
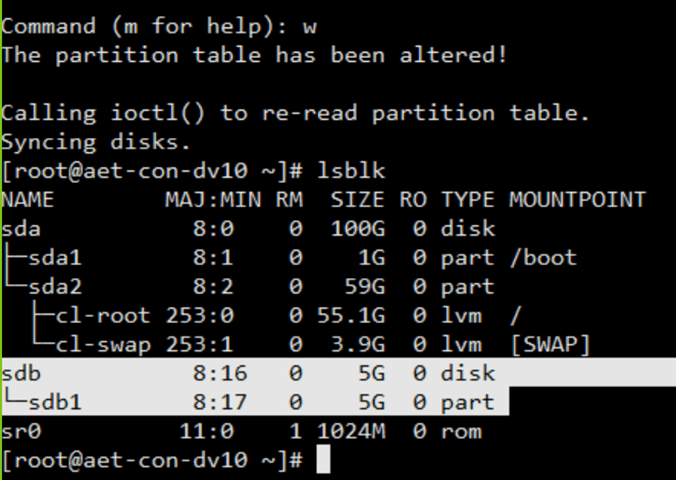
List the block device again to display the new disk partition /dev/sdb1
The next step is to format the new hard drive with the desired file system using the command
mkfs (make file system)
mkfs.ext4 /dev/sdb1
Mounting The Disk
First, in the root directory, we will create a new folder named “recordings”, here, we will mount our new disk temporarily for synchronizing the existing recordings.
- mount /dev/sdb1 /recordings
- mv /var/spool/asterisk/monitor/ /recordings/*
Now that we have the recordings in our new hard drive, we will umount our hard disk for mounting it permanently at /var/spool/asterisk/monitor. For this, we will need to edit the file “/etc/fstab”, and add the following line at the end of the file.
/dev/sdb1 /var/spool/asterisk/monitor ext4 defaults 0 0
We can test that everything is well configured using the command “mount -a”. This command will mount our disk in the monitor folder. To test that all the data is there we can use the command “ll” to check that all our previous files or recordings are listed.
ll /var/spool/asterisk/monitor/